Hey there, dreamer! So you want to start a YouTube channel, right?
Well, you’ve come to the right place. In this article, We will be going to share with you our top tips on creating a YouTube channel.
We all know that YouTube is one of the most sought-after platforms, and having a channel will create a wealth of opportunities:
- Generation leads for your business.
- Improves your brand’s presence.
- Establish yourself as a credible source of information.
- An additional source of traffic for your business.
Are you looking for an easy way to kick off your adventure with YouTube? Setting up a channel is the place to begin!
In this article, we will provide you with a step-by-step plan to assist you with building your YouTube channel. Let’s get started!
A Step-By-Step Plan To Create a YouTube Channel
Creating a YouTube channel helps you explore different avenues. So here’s how you can do it:
1. Sign Into Your Google Account
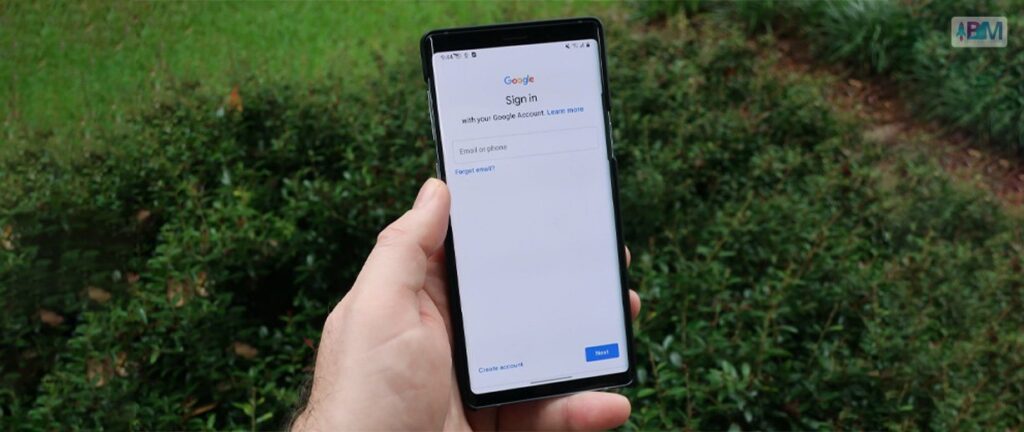
Before starting your channel, you need to sign into your Gmail account.
If you already have a Gmail account, you can create a YouTube channel with that. Visit YouTube.com and click on ‘sign in’.
- Those who already have a Gmail account will be redirected to sign in.
- Be sure to pick the Google account you’d like to link to your YouTube channel if you have more than one.
- If you don’t already have a Google account, click “Create Account” and follow the steps to sign up.
2. Create YouTube Account
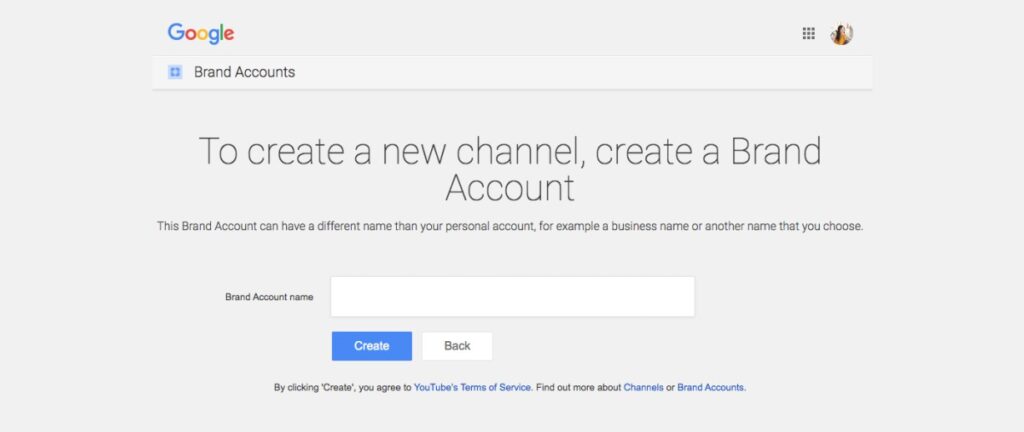
With your Gmail account creating your YouTube account is that simple.
- Visit the YouTube account page.
- Click on ‘create a channel.’
- Enter your brand name there.
We highly recommend businesses create a brand account unless you’re not a creator. The brand account helps you add multiple admins, and you can personalize some aspects to match your brand.
Another benefit of having a brand account is getting access to YouTube Analytics. By doing so, you can gauge the type of content that is popular and who is consuming your content.
3. Customization
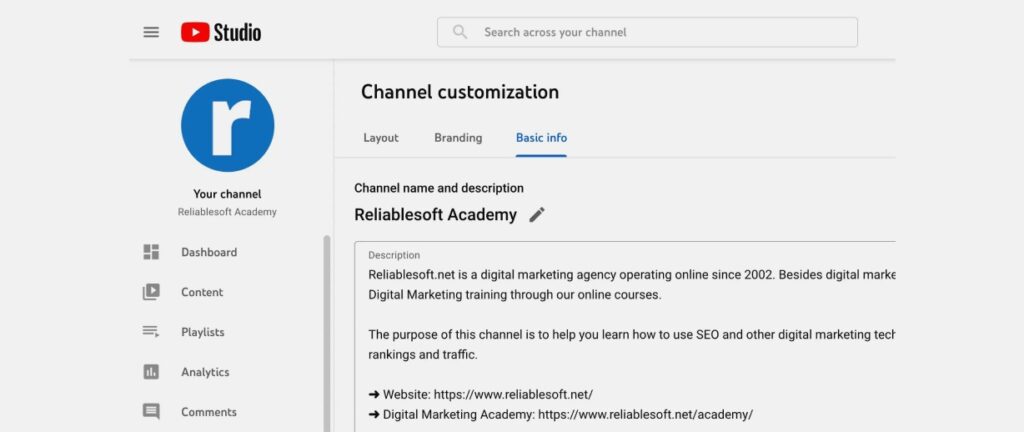
An optimized YouTube channel requires customization.
- Select ‘customize my channel’ from the YouTube dashboard.
- There you’ll find 3 tabs – Layout, Branding, and Basic info.
Video Spotlights: Here, people will see the first video visible on your channel. Here you can add two types of video:
- A channel trailer.
- A feature video intended for your customers.
Keywords: Incorporate keywords in your channel’s description. Adding long keywords helps your video to come on the search query and make your channel more visible.
Branding: By adding visual appeal to your channel, you can brand your channel.
- People will first notice your channel’s profile picture when they land on your channel. So you must put some effort into it. The ideal length of your profile picture is 800 x 800 px.
- Create a visually tempting cover banner (2048 x 1152 px) for your Youtube channel. Add a short text to it.
4. Adding Basic Info
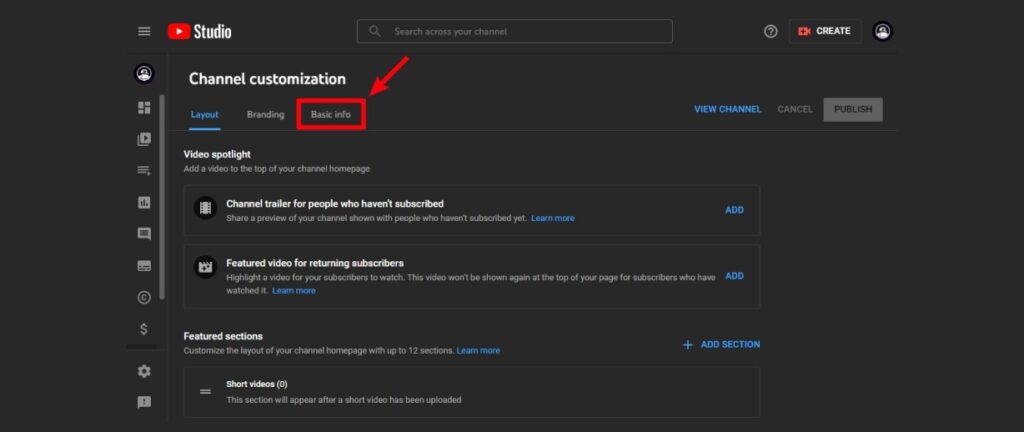
Now that your account is set up, let’s make your YouTube channel official by making your business or personal account channel.
One of the first things you need to get done is to change the channel name to something that speaks to the type of content that you present. This simple task will make it easier for followers to find your channel by searching for your business or organization name.
To get started, click Basic Info from the top menu. From here, you can change your channel name, description, and URL.
(i) Logo
Think about which image or symbol will become your channel’s emblem. It’ll be seen in multiple places, such as the web pages where your videos are posted and the comments you leave. To get creative, you can make use of programs like Adobe Photoshop or Illustrator.
(ii) Channel Art
Your banner image is another important element for your YouTube channel. When selecting a banner image, think about how the visuals can best represent your brand and build upon the style of the photo you chose for your profile.
It can be anything from a great photo to a custom-made graphic or illustration that showcases your brand.
Making sure it’s well-crafted can help enhance your brand and freshen up your profile image. To get the most out of it, ensure the image is at least 2048×1152 pixels in size and not bigger than 6 MB.
(iii) Icon
Your video watermark should be thoughtfully chosen and applied to your videos. It should be an element of your logo that is able to represent your brand and be distinct from your profile picture. Consider which icon will best serve as your video watermark.
Having a watermark on your videos makes it easy for your audience to identify them, allowing for a consistent connection back to your account.
(iv) Description
You have 1,000 characters to put a unique spin on your channel description. Feel free to include versions of it in different languages and keywords that viewers may use to search for your content.
(v) Contact Info
Include an email address that anyone can reach you at for any business or press-related inquiries.
5. Upload Your Video
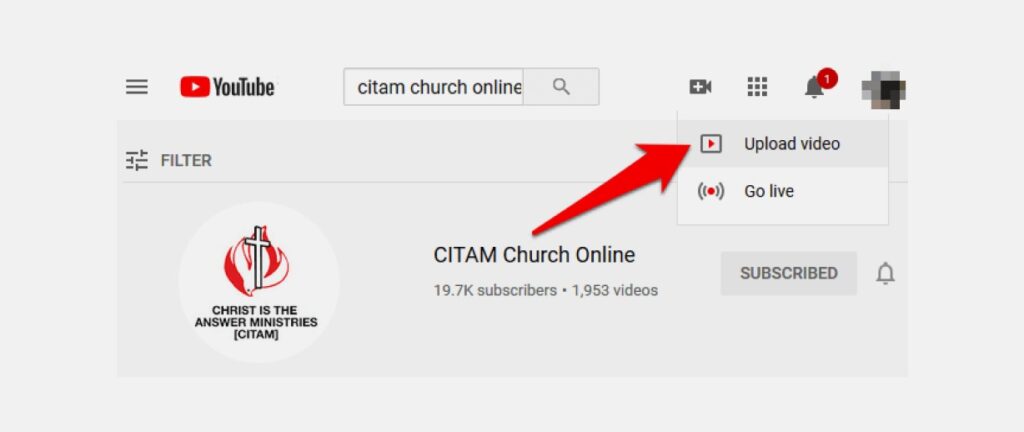
D-Day has arrived!
It’s time to upload your inaugural video to your YouTube channel– quite an exciting moment!
Fortunately, it’s simple to upload a video to your page, which will assist in making sure your audience visits since it will feature engaging video content.
To ensure you can get to your video file easily, save it to a place on your computer like the Documents folder, Desktop, or even the Downloads folder. That way, you can open it up quickly!
Head back to your channel and hit the Create button on the corner of your screen. Once you do, a window will appear where you can select which file to upload.
To make uploading the video file to YouTube quick and easy, click ‘Select Files‘ to find the file you just saved to your computer. Don’t forget the vital steps after the initial upload, such as optimization, to ensure your video looks great!
6. Customize Your Channel’s Layout
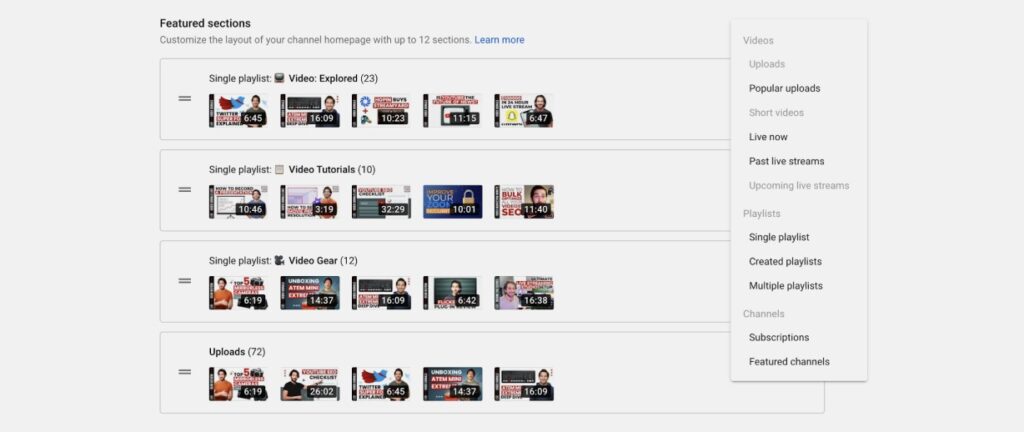
Customizing your YouTube channel layout can let your viewer know that you have consistent content and suggest to them what to watch first.
(i) Trailer
One of the first things you’ll notice when you arrive is an area to upload a trailer – thirty seconds to a minute of footage that will nicely explain the content your channel has to offer and why everyone should be subscribing!
(ii) Content
After selecting ‘Add a section’ at the bottom, then click on ‘Content’ to view a list of the available options for content to add to your page.
- Starting off with Uploads, which holds the list of videos sorted by views, is a great option to add to your channel.
- Plus, you can just tell what it is.
- Additionally, if you’re someone who streams a lot, consider Live Now to keep your audience updated on your streams and Upcoming Live Streams to inform them of when you’ll be coming online.
- Lastly, you may also have the option to add Past Live Streams to keep them separate from the other videos.
(iii) Designing Your Channel
Let’s begin constructing your channel! Using the horizontal row is a good call for a more polished look. To give certain content more presence, you could also add vertical playlists.
Staying organized can be a great way to keep your channel looking clean and neat. To do this, I suggest keeping all your playlists together, with the exception of your ‘Uploads‘ section – this should be placed in the middle for easy access to your newest content.
Frequently Asked Questions (FAQs):
Other questions you may have about starting a YouTube channel:
Competition is tough, and no one has the time to be dealing with bad sound, lighting, and editing.
You can save both your hard-earned money and valuable time by investing in quality equipment.
If You’re Serious About Growing Your YouTube Channel, You Need The Following:
1. A good camera.
2. External microphone.
3. Video and audio editing software.
And once you start uploading content, start using any YouTube SEO tools.
Consistency is key!
No matter the frequency of your content, having the same publication day and time can bring a sense of reliability to your viewers.
You should try to upload more than once a week, preferably exceeding twice.
Use stories and your Community Tab to bridge the distance between videos.
Feeling free to break the rules every once in a while is encouraged, given YouTube’s ever-evolving discovery model.
It’s A Wrap-Up!
Creating your YouTube channel is the stepping stone of your YouTube journey. We hope this article has given you enough insights to help you with this.
If you have further doubts, you can get in touch with us.
Do you feel creating a YouTube channel is enough to thrive in the YouTube landscape? We want to hear from you.
Read Also:
